Cart 0
Do you want to disable the default WordPress sitemap on your website? The default sitemap function, introduced in WordPress 5.5, allows WordPress to automatically publish XML sitemaps for your website. The difficulty is that this function missing advanced WordPress SEO features that are required to rank higher. In this article, we will show how to easily disable the WordPress sitemap and replace it with a more effective solution.
Why Should You Disable the WordPress Sitemap?
An XML sitemap is a file that lists all of your website’s content in XML format, allowing search engines to easily identify and index it. Sitemaps are extremely valuable to your website because they increase traffic and boost the SEO rankings of your site.
However, many WordPress SEO plugins, such as Yoast SEO, All in One SEO, and Google XML Sitemaps, already include sitemaps on your site, resulting in WordPress sites with two sets of sitemaps. Duplicate sitemaps for the same WordPress page might confuse search engines and lower your SEO rating.
If you are not using an SEO plugin for your sitemap, then you are missing out on advanced features. For example, many popular WordPress SEO plugins offer features like a Video Sitemap, News Sitemap, and RSS Sitemap to help you outrank your competitors in SEO.
With that being said, let’s see how you can easily disable the default WordPress sitemap:
- Disable WordPress Sitemap Using WordPress SEO Plugin
- Disable WordPress Sitemap using Code Snippet
Method 1: Disable WordPress Sitemap Using WordPress SEO Plugin
If you use one of the top WordPress SEO plugins, the default WordPress sitemap feature will be immediately disabled and replaced with a more powerful alternative.
For the sake of this article, we will explain the Yoast SEO plugin, which we use on WPDruggy.
Yoast SEO is the best WordPress SEO plugin for quickly optimizing your WordPress site for search engines and social media platforms. Yoast SEO is used by over 5+ million websites worldwide, including our own. By default, Yoast SEO will enable their Sitemap feature, which will immediately replace the basic WordPress sitemaps when activated.
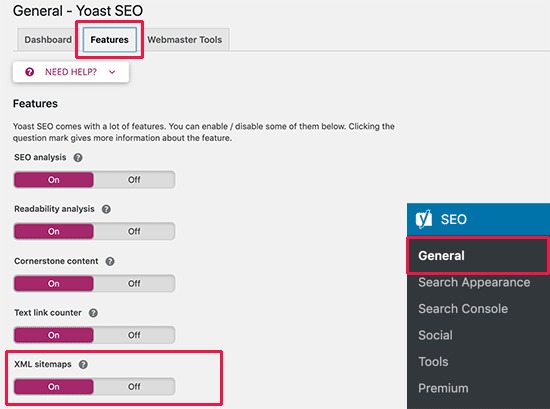
The first step is to install and activate the free Yoast SEO plugin. After activation, you will need to set up the Yoast SEO plugin. After that, click on the Yoast SEO » General » Site features sitemaps page in the WordPress admin dashboard to check your sitemap settings.
Next, select the ‘XML Sitemaps‘ option. Ensure the ‘Enable Sitemap’ setting is set to ‘Active/On‘. This disables the default WordPress sitemap.
Method 2: Disable WordPress Sitemap Using Code Snippet
You can simply disable the default WordPress sitemap with code. You can insert the code snippet into your theme’s functions.php file. However, the most serious issue with adding code to your functions.php file is that even little errors might cause your website to crash.
That is why we recommend using WPCode to integrate custom code into WordPress. This free plugin allows you to easily add code snippets to WordPress without having to alter your theme’s functions.php section.
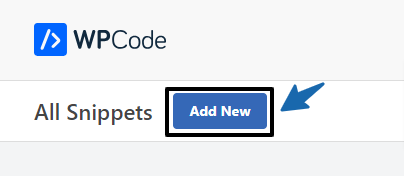
First, install and activate the WPCode Free Plugin. Next, navigate to the new Code Snippets option in your WordPress dashboard’s left-hand menu. This will navigate you to the ‘All Snippets’ page.
Next, simply click the ‘Add New‘ option.
WPCode will then lead you to the ‘Add Snippet‘ page, where you can enter your custom code or search for an existing snippet in the WPCode library.
We need to add new code, so hover over the ‘Add Your new Code (New Snippet)‘ option and select ‘Use snippet.‘

Now you’ll be directed to the ‘Create Custom Snippet’ page. Begin by naming your code piece. It can be anything you want.
Then, select a ‘Code Type‘ from the dropdown menu on the right. Because we will be using PHP code, simply select the ‘PHP Snippet‘ option.

Simply put the following PHP code snippet into the ‘Code Preview‘ box.
add_filter( 'wp_sitemaps_enabled', '__return_false' );When you’re done, it’ll look like this.

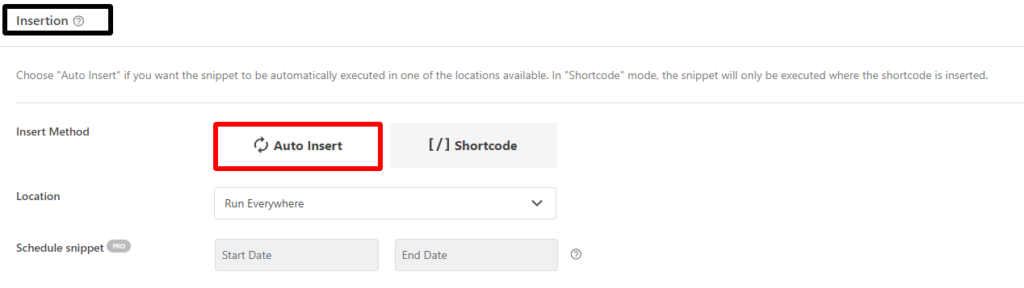
After pasting the code, scroll down to the ‘Insertion‘ section, which has two insert methods.
Simply select ‘Auto Insert‘ if you want it to run sitewide.
Now, go to the top of the page, change the switch from ‘Inactive’ to ‘Active‘ in the upper right corner, and click the ‘Save Snippet‘ button.
Once you’ve saved and enabled the code snippet, the default WordPress sitemap will be disabled.

Read More Relevant Blog
- How to Disable Overflow in WordPress – Remove Horizontal Scroll
- How to Disable WordPress Admin Email Verification Notice
- How to Delay Posts from Looking in the WordPress RSS Feed
- How to Enable Automatic Updates in WordPress for Major Versions
- How to Properly Disable Lazy Load in WordPress
- How to Easily Add Custom Code in WordPress
- 10+ Most Popular Digital Products Can Sell Online in 2024
- 10+ Best WordPress Themes for SEO Experts in 2024
- How to Do Keyword Research for Your WordPress Blog
- 10 Best Lead Generation Plugins for WordPress in 2024
The Final Thought
To summarize, removing the default WordPress sitemap is a simple step that can be achieved with either a plugin or a few lines of code in your theme’s functions.php file. Whether you prefer the simplicity of a plugin or the customization provided by manual code modification.
The decision is ultimately up to your preferences and level of WordPress development experience. By following the instructions in this guide, you can effectively remove the default sitemap feature and investigate other choices for managing your site’s sitemap functionality.

